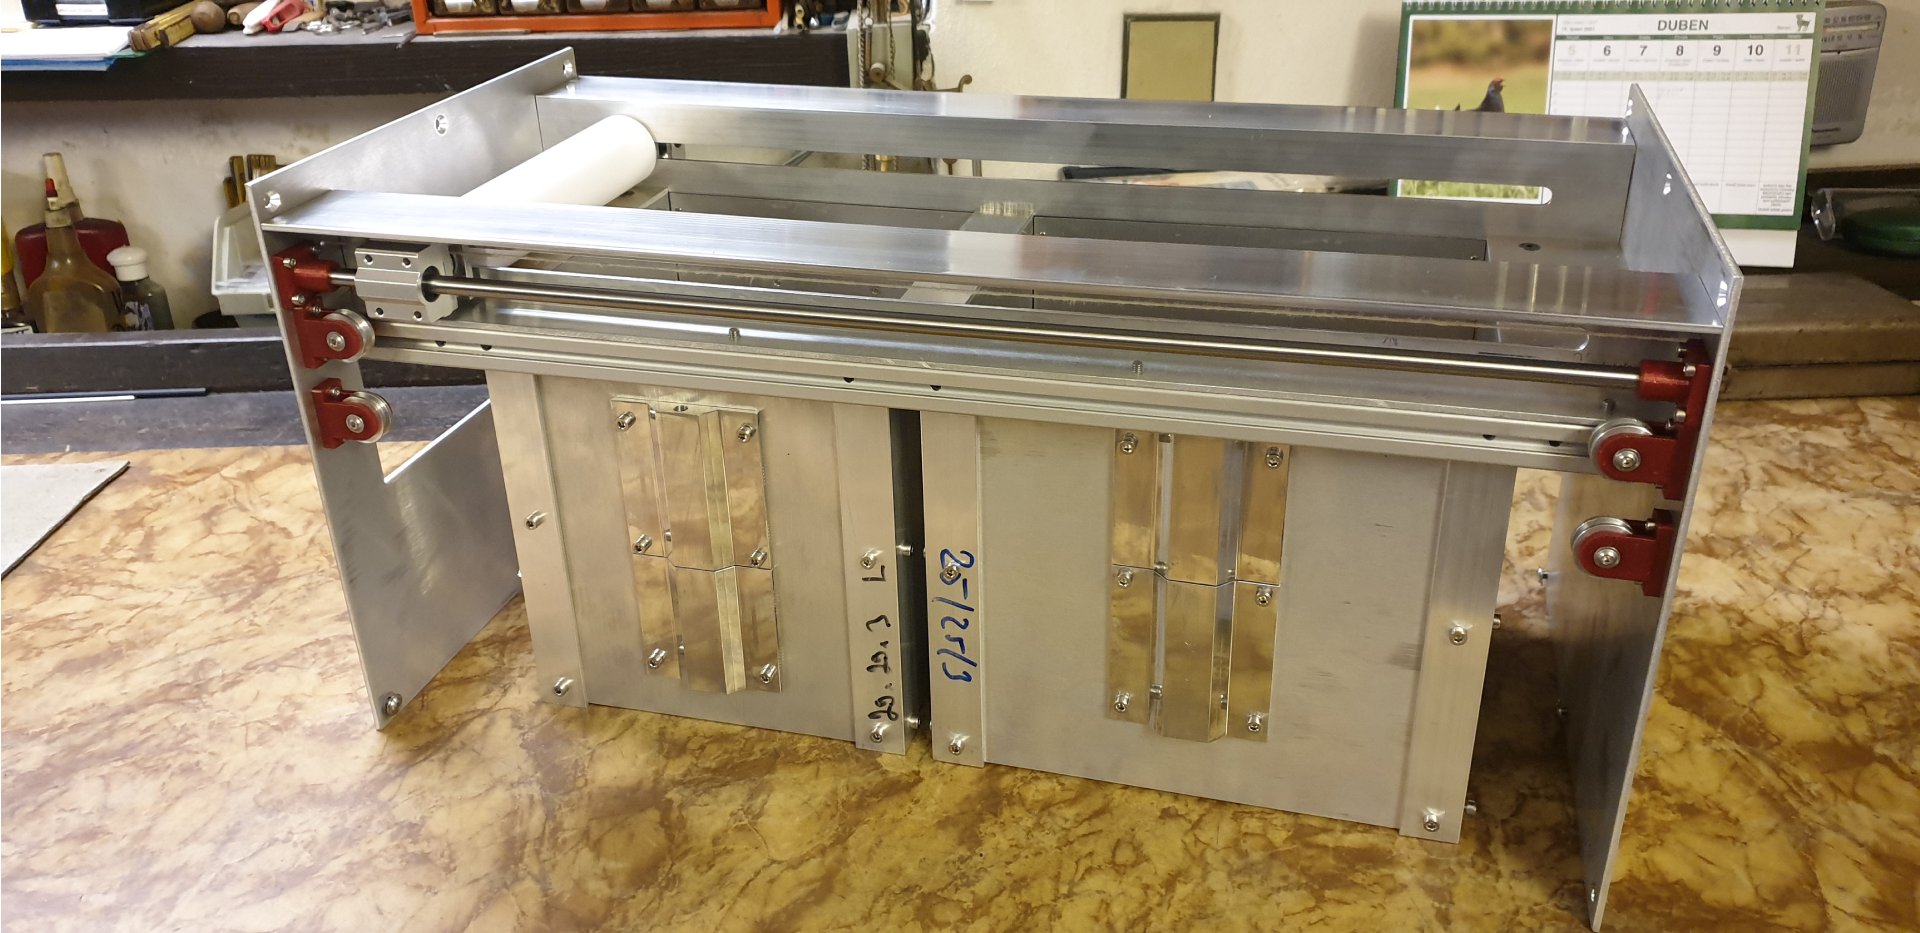
Manufacturing of the recoater assembly was a pleasure. That was because I did a lot of work at my old-fashioned lathe machine. It is something, I really like to do. In accordance with my Fusion 360 design, I went for the layout containing counter rotating roller even it is not the simplest approach. Despite, it is often used by “big guys” of the PA12 3D printer world, and I guess they know why.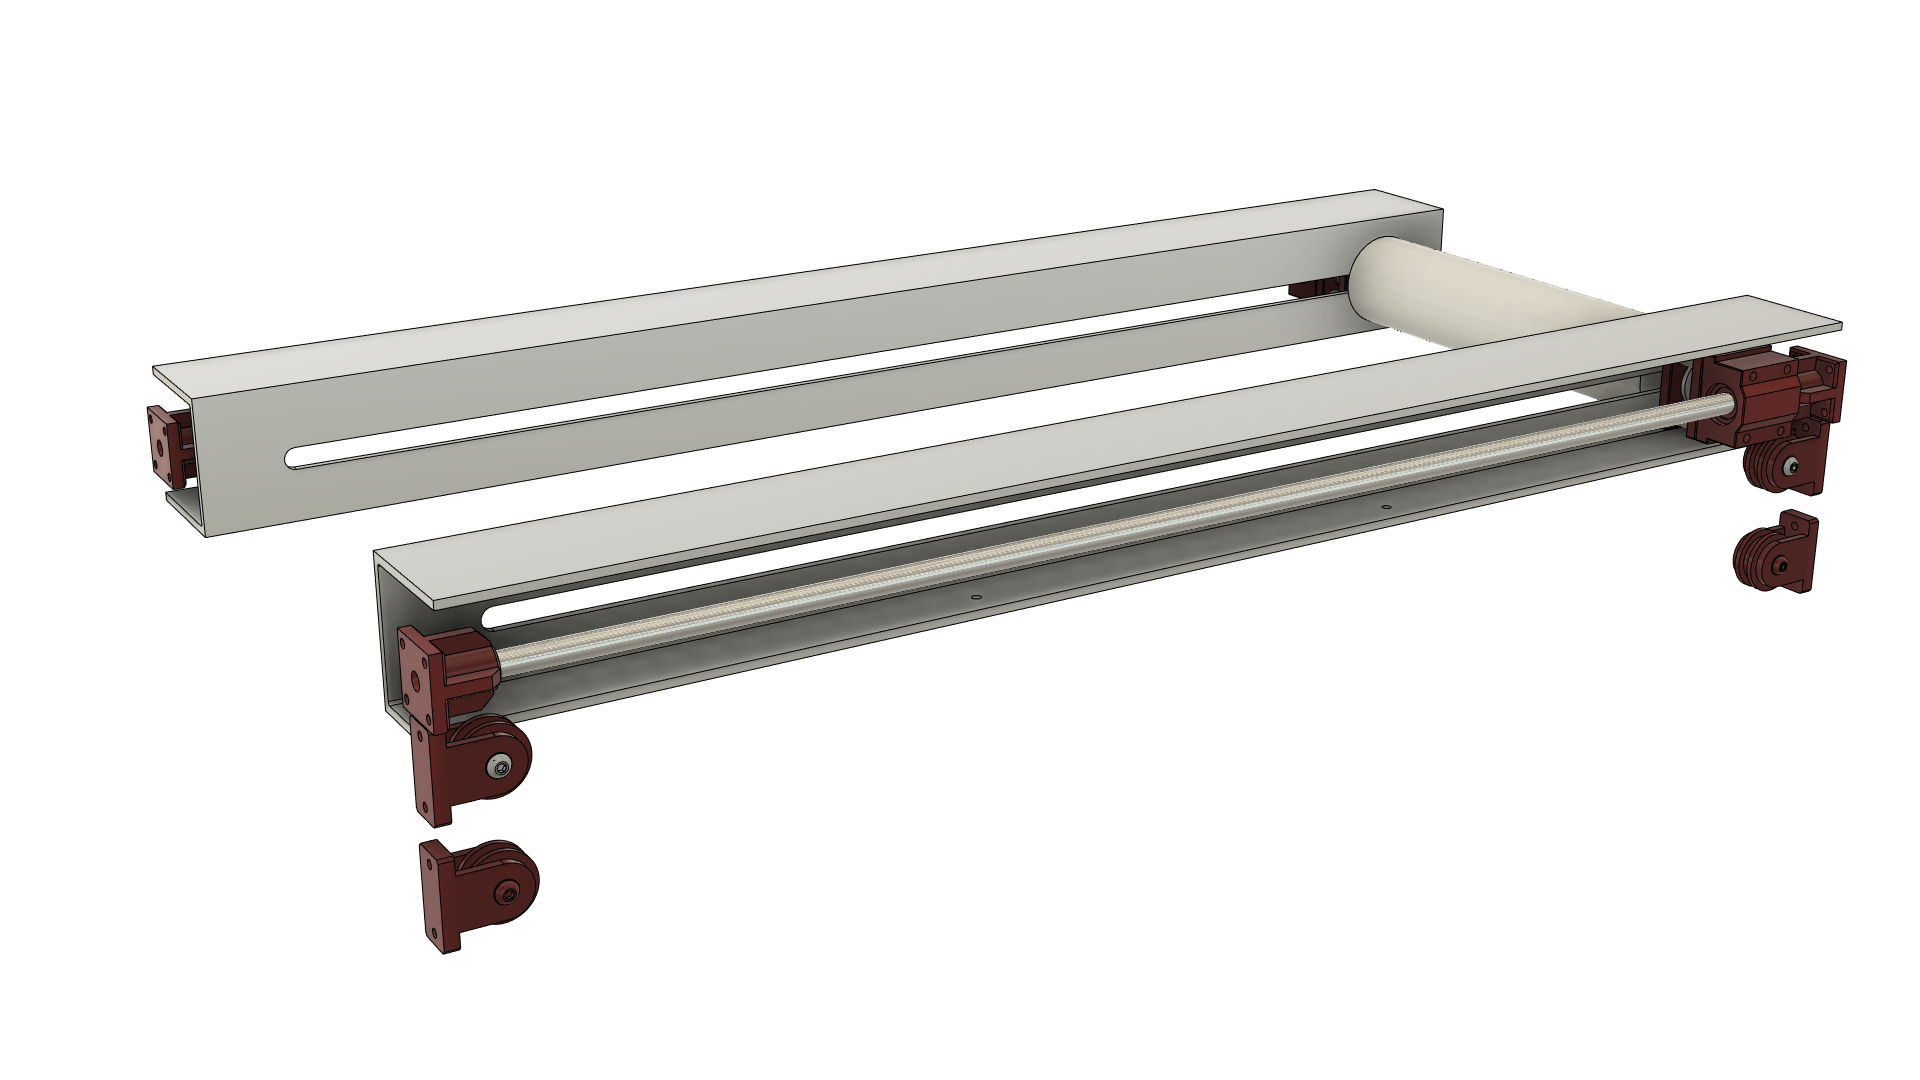
My reason was, I wanted to have not only the perfect top layer’s surface but also to press particular layers together. Unfortunately, I didn’t have any idea how many complications this solution brings me at the end. If I would have proceeded with the simple aluminum plate wiper, my life would be definitely easier. Even at the time of writing this post I am still dealing with some issues. But let’s not jump the gun.
From the constructional perspective the recoater must have following main features:
- move the powder from the top of the reservoir chamber to the print one
- make counter rotation to smooth the top layer as well as to press layers together
- be made from the material, which is antistatic, heat resistant and has good sliding characteristics
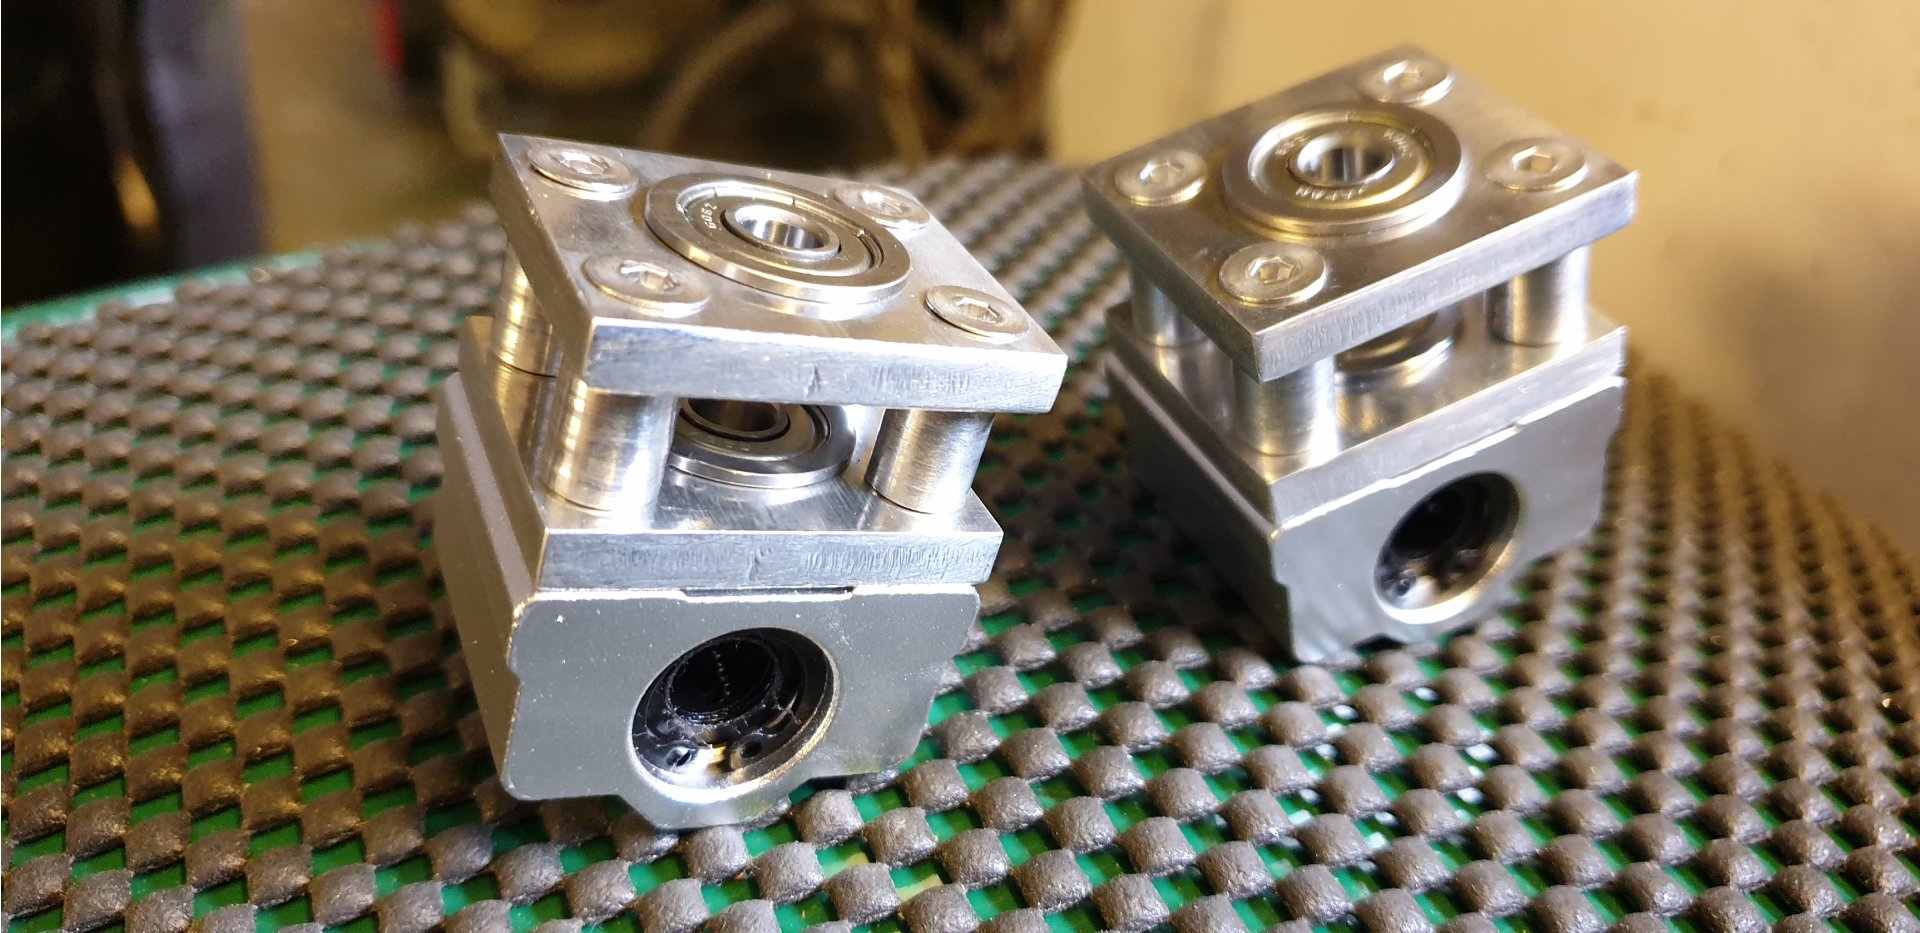
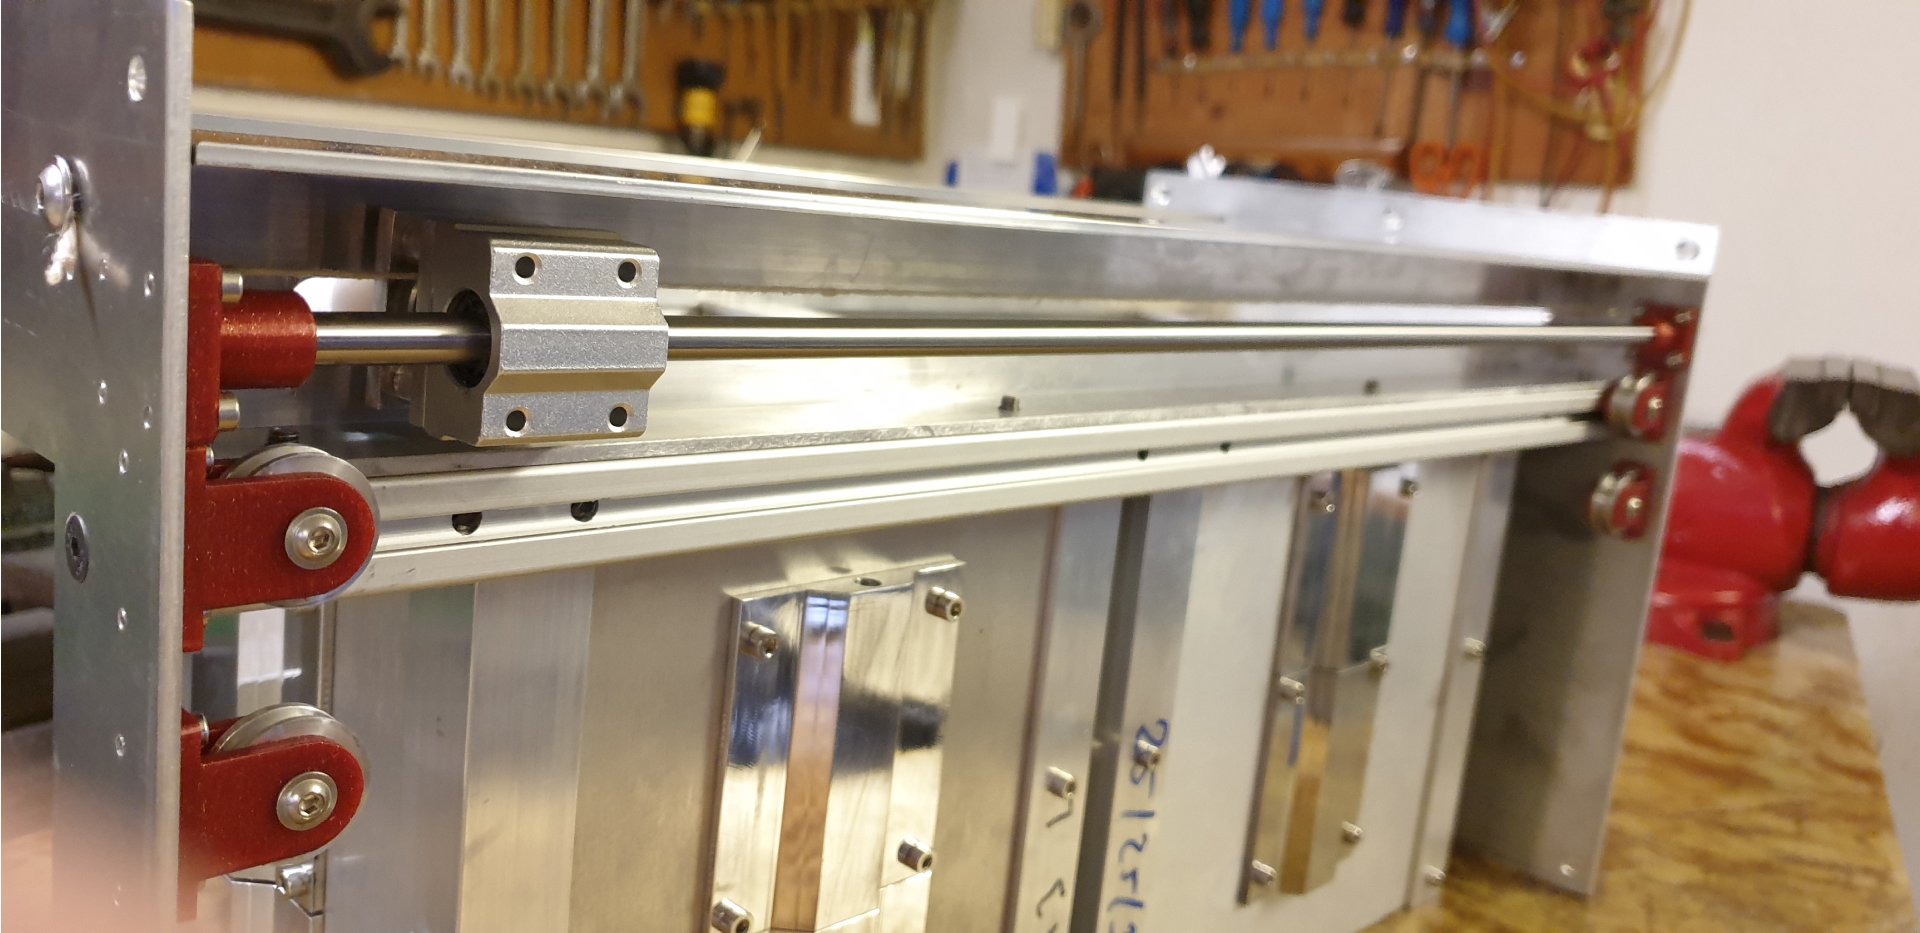
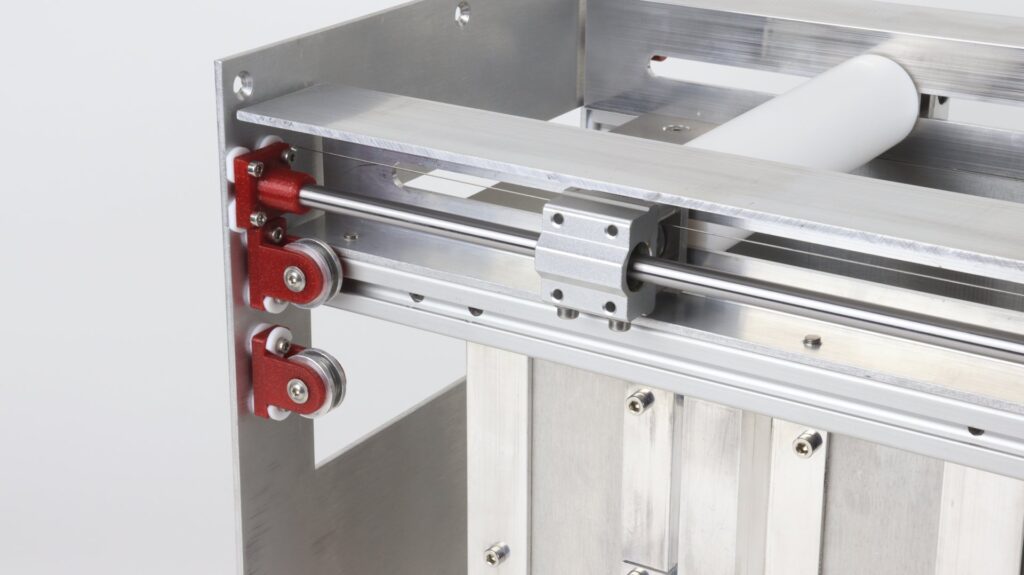
Smooth rods and linear bearings’ housings
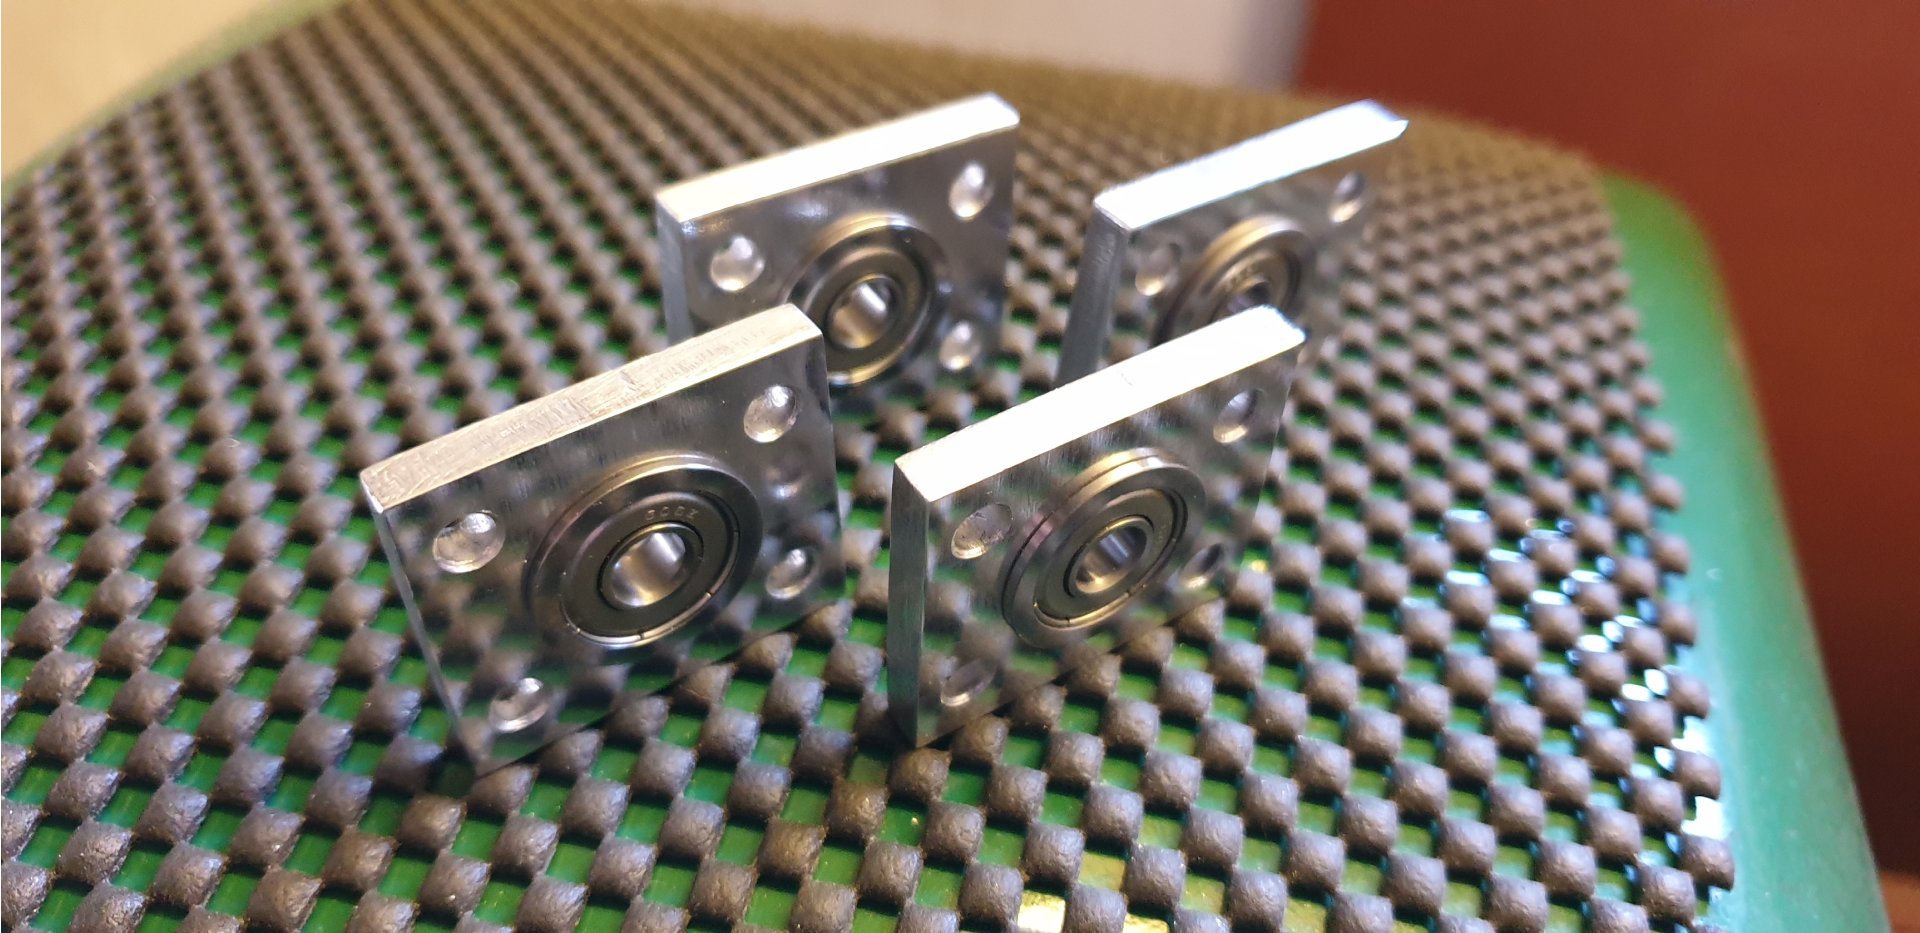
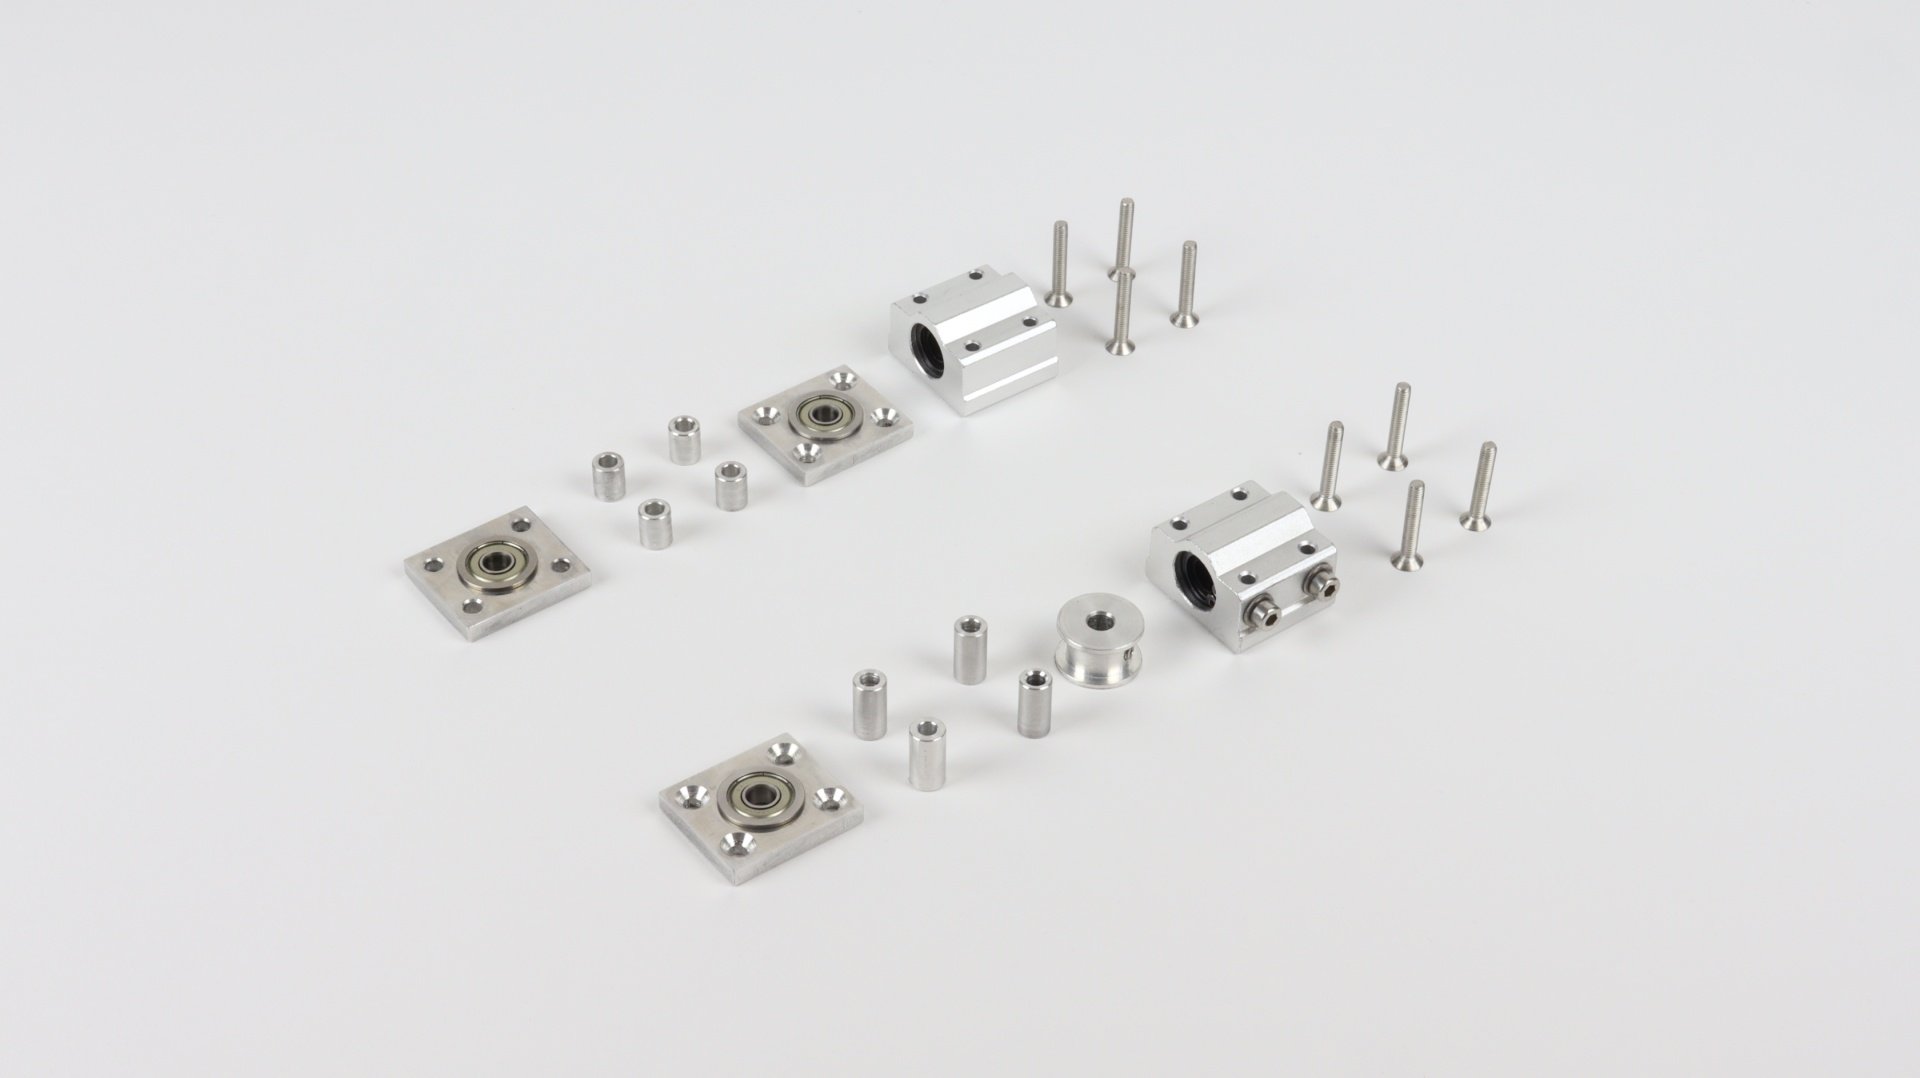
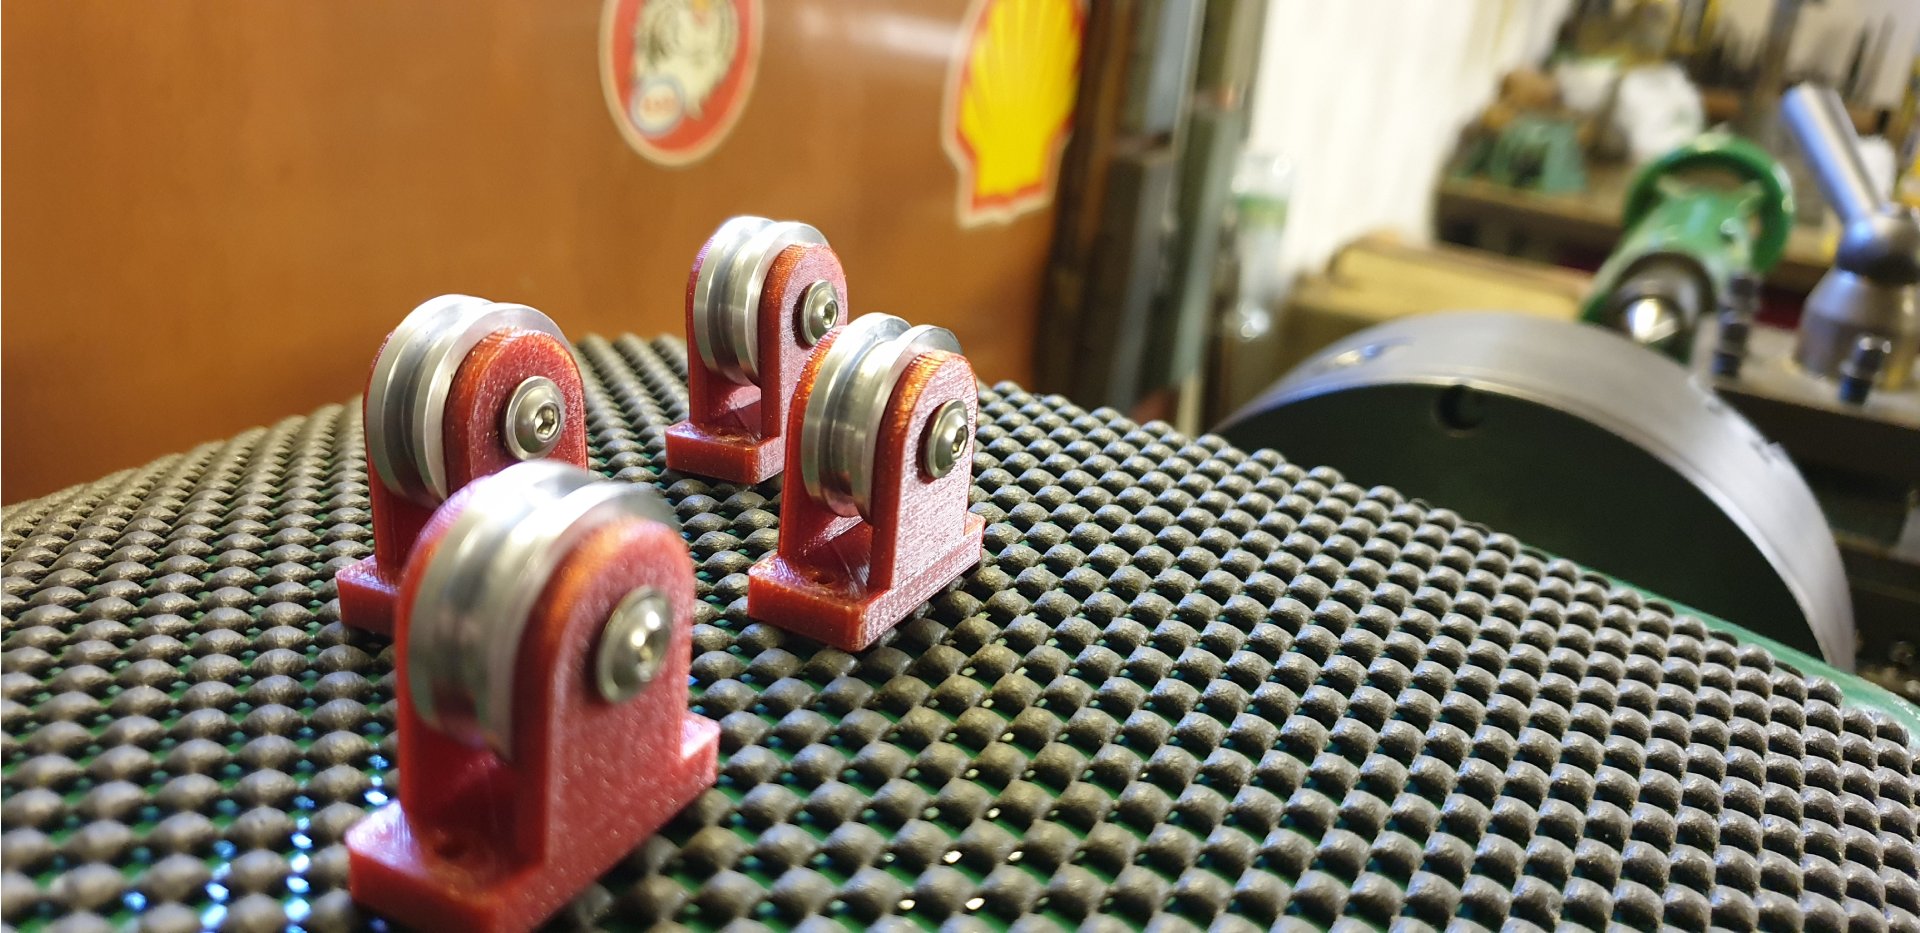
Based on these requirements I decided to use the 8mm smooth rod rails with the SCS8UU linear bearing housings to ensure the linear moves. These were extended by the ball bearing housings (5mm aluminum) to accommodate the flanged ball bearings (type F606ZZ). All components from the aluminum sheets were, again, laser cut on CNC machine. That’s why are all the edge-surfaces a bit rough. But it is just the esthetic issue, so no problem.
Initially, I made two housings on each side separated by distance spacers to ensure proper rotation of the roller. But after some testing I removed one housing on one side. This enabled me to accommodate wider pulley for the roller’s counter rotation to minimalize problems with the rope over-skipping. I will come back to this issue in detail later in this post.
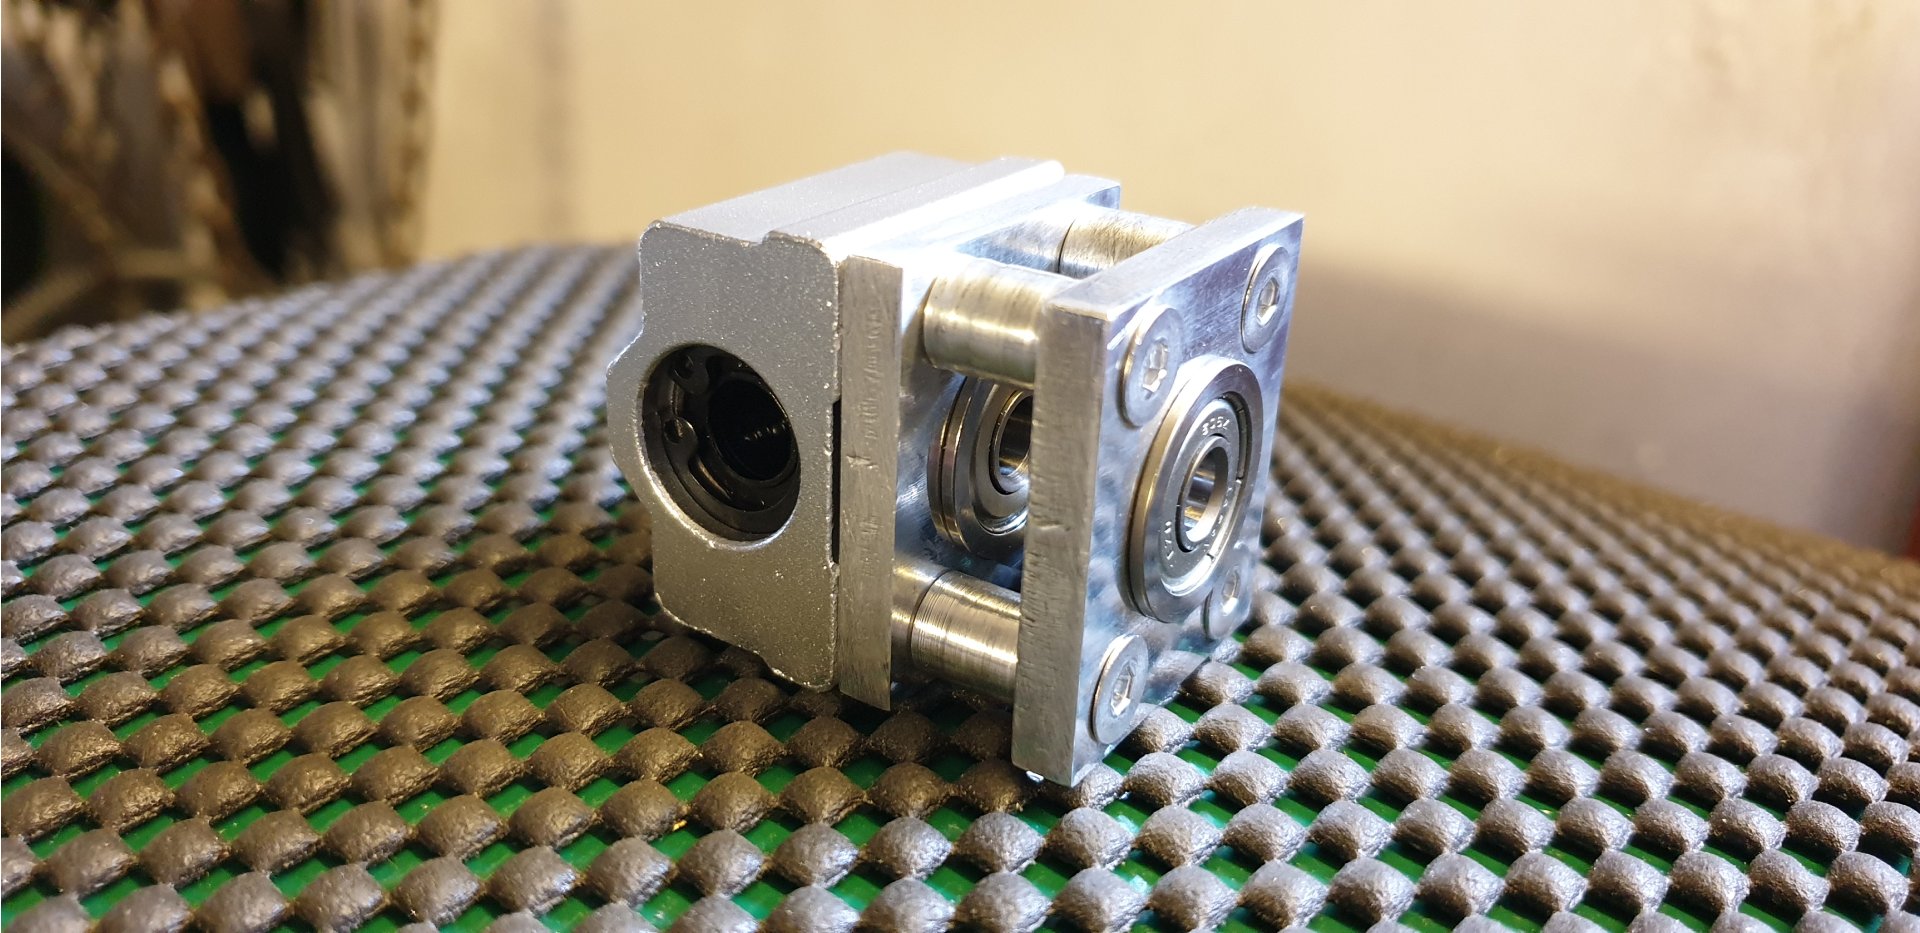
So finally, it ended up with the layout where drive train side has just one ball bearing housing (see following picture). I prolonged distance spacers by the original housing thickness which means by 5mm. Everything holds together thanks to the countersunk head screws having 4mm in diameter.
Production of the roller and drive pulleys sets
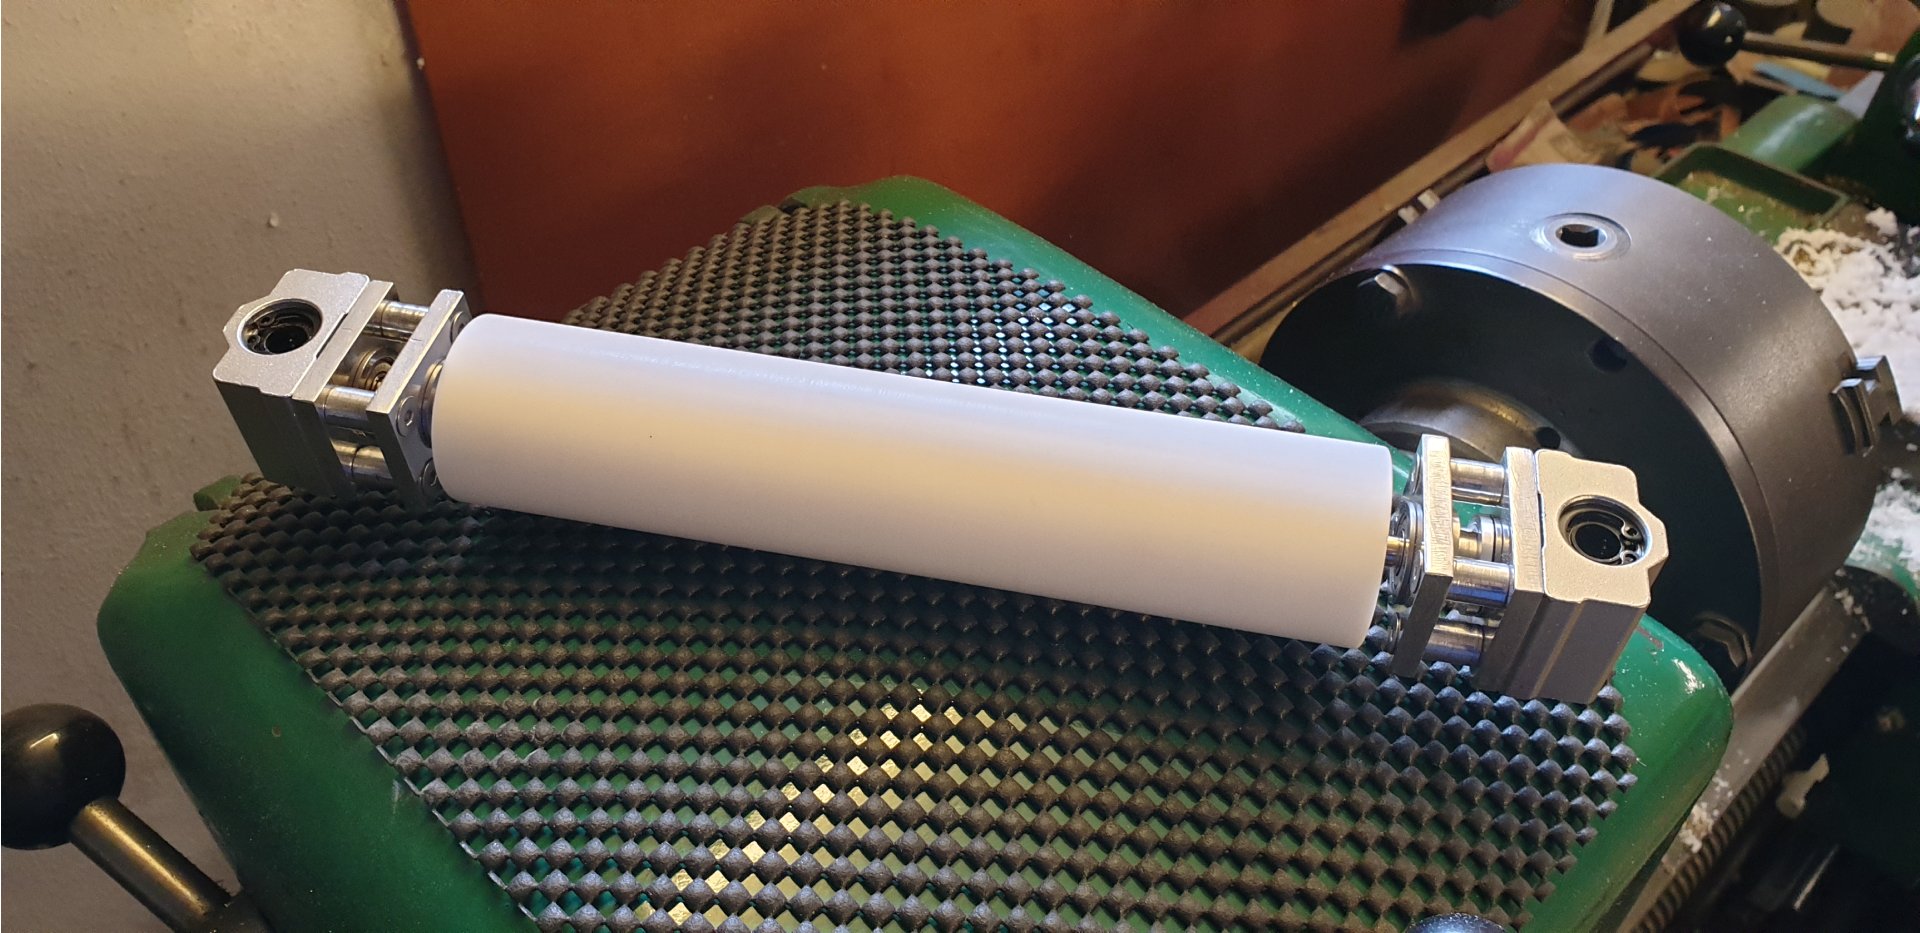
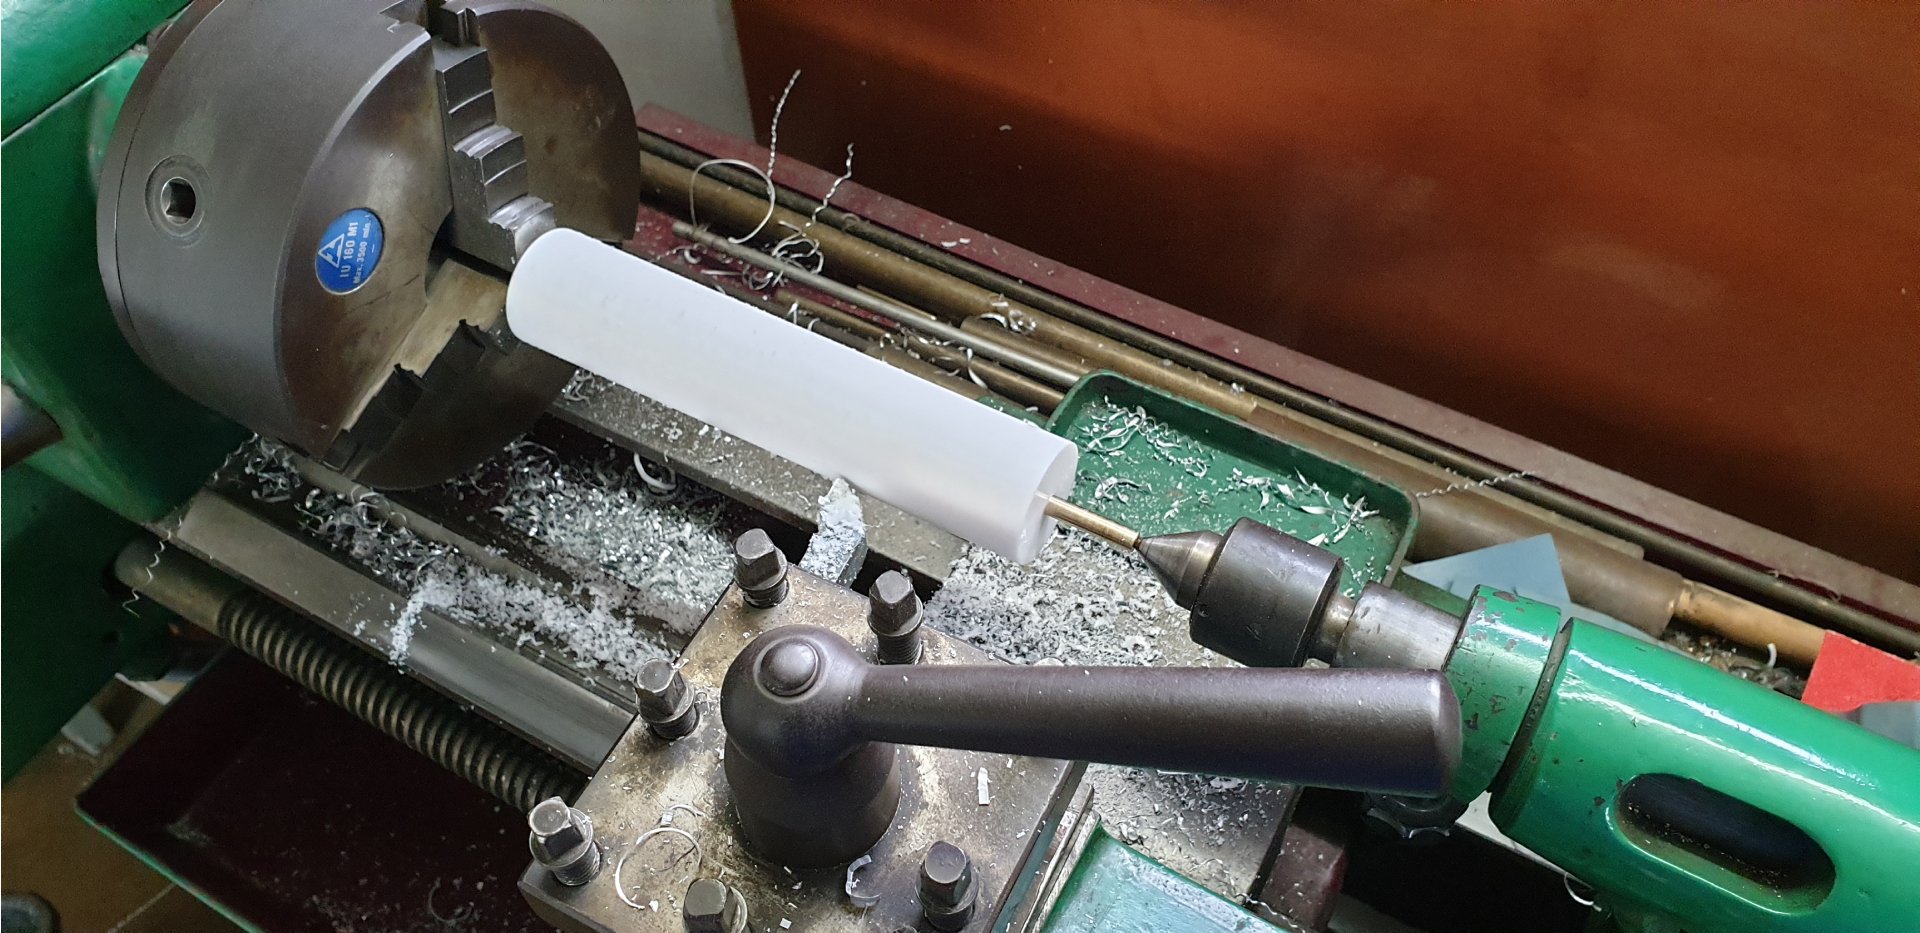
Before I started to work on the roller, I had to select right material. First thoughts led to aluminum again, but I had some doubts related to the powder sticking while roller is hot. That’s why I reached for the Teflon. I bought 40mm diameter rod and lathed it to 38mm which was the dimension I needed. As I was worried about concentricity while drilling the through-hole for the shaft I made two short shafts. Actually, I had made and installed them before I lathed the roller. Then I lathed roller with the shafts installed to have all three pieces perfectly concentric.
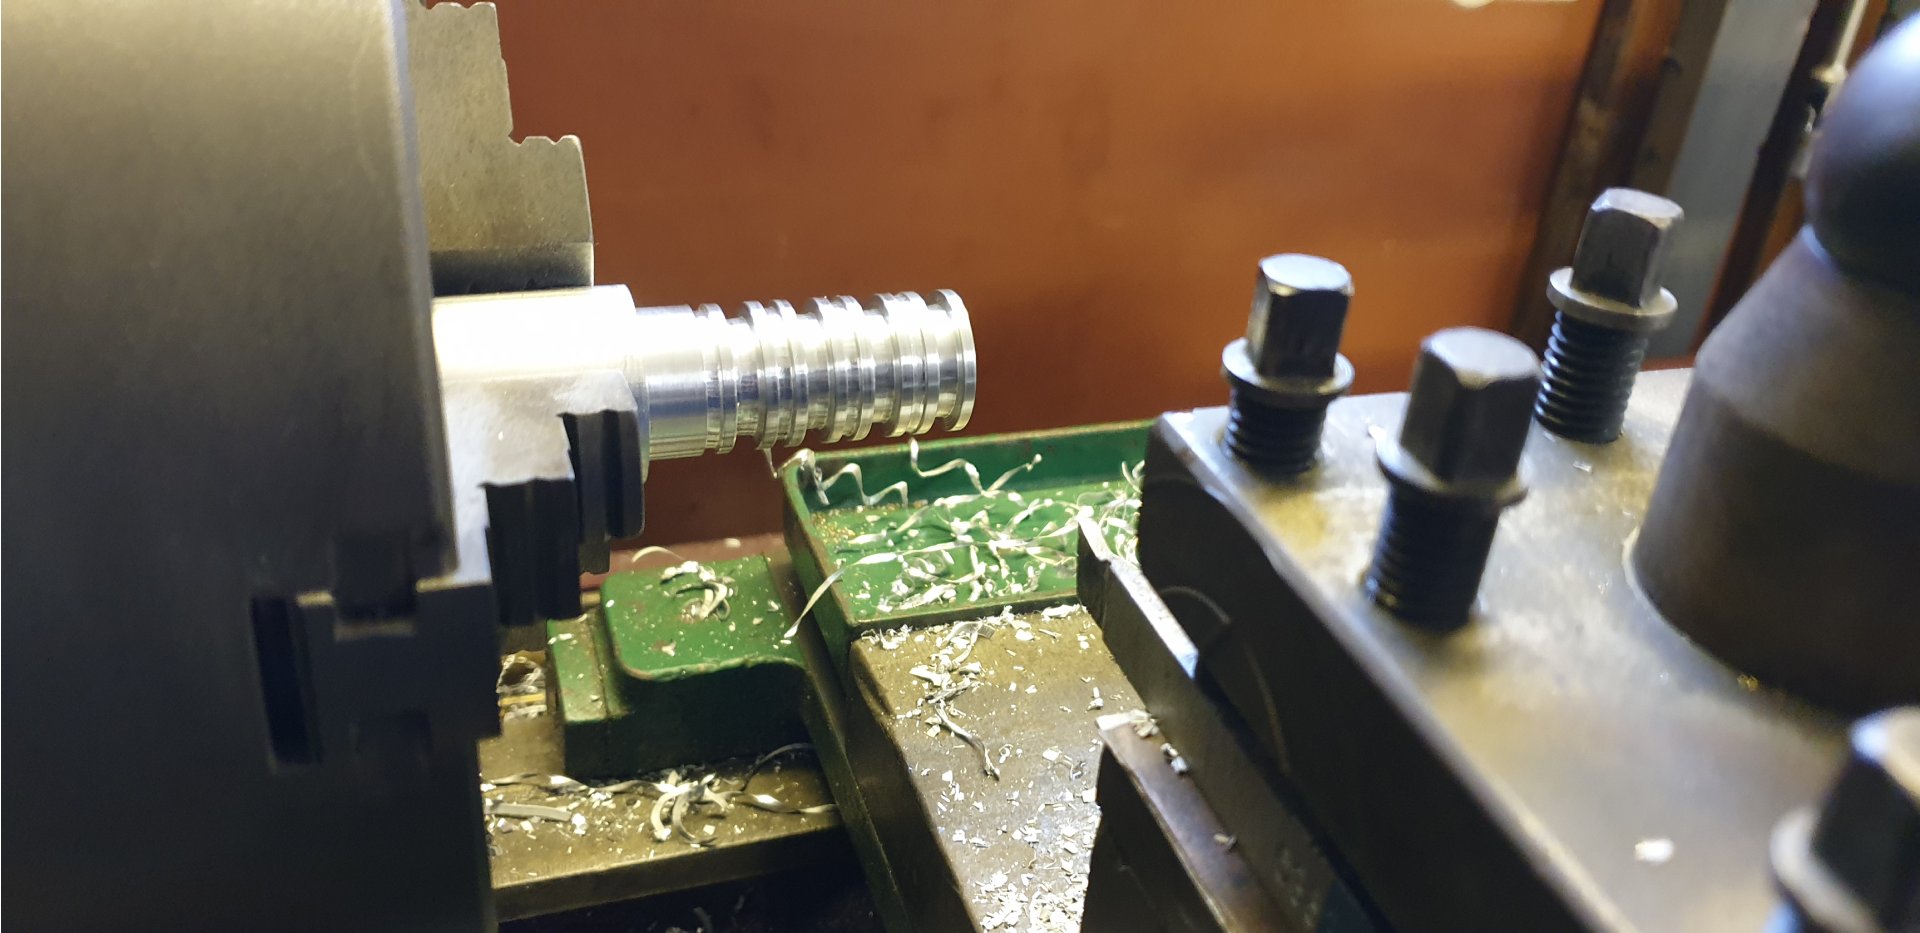
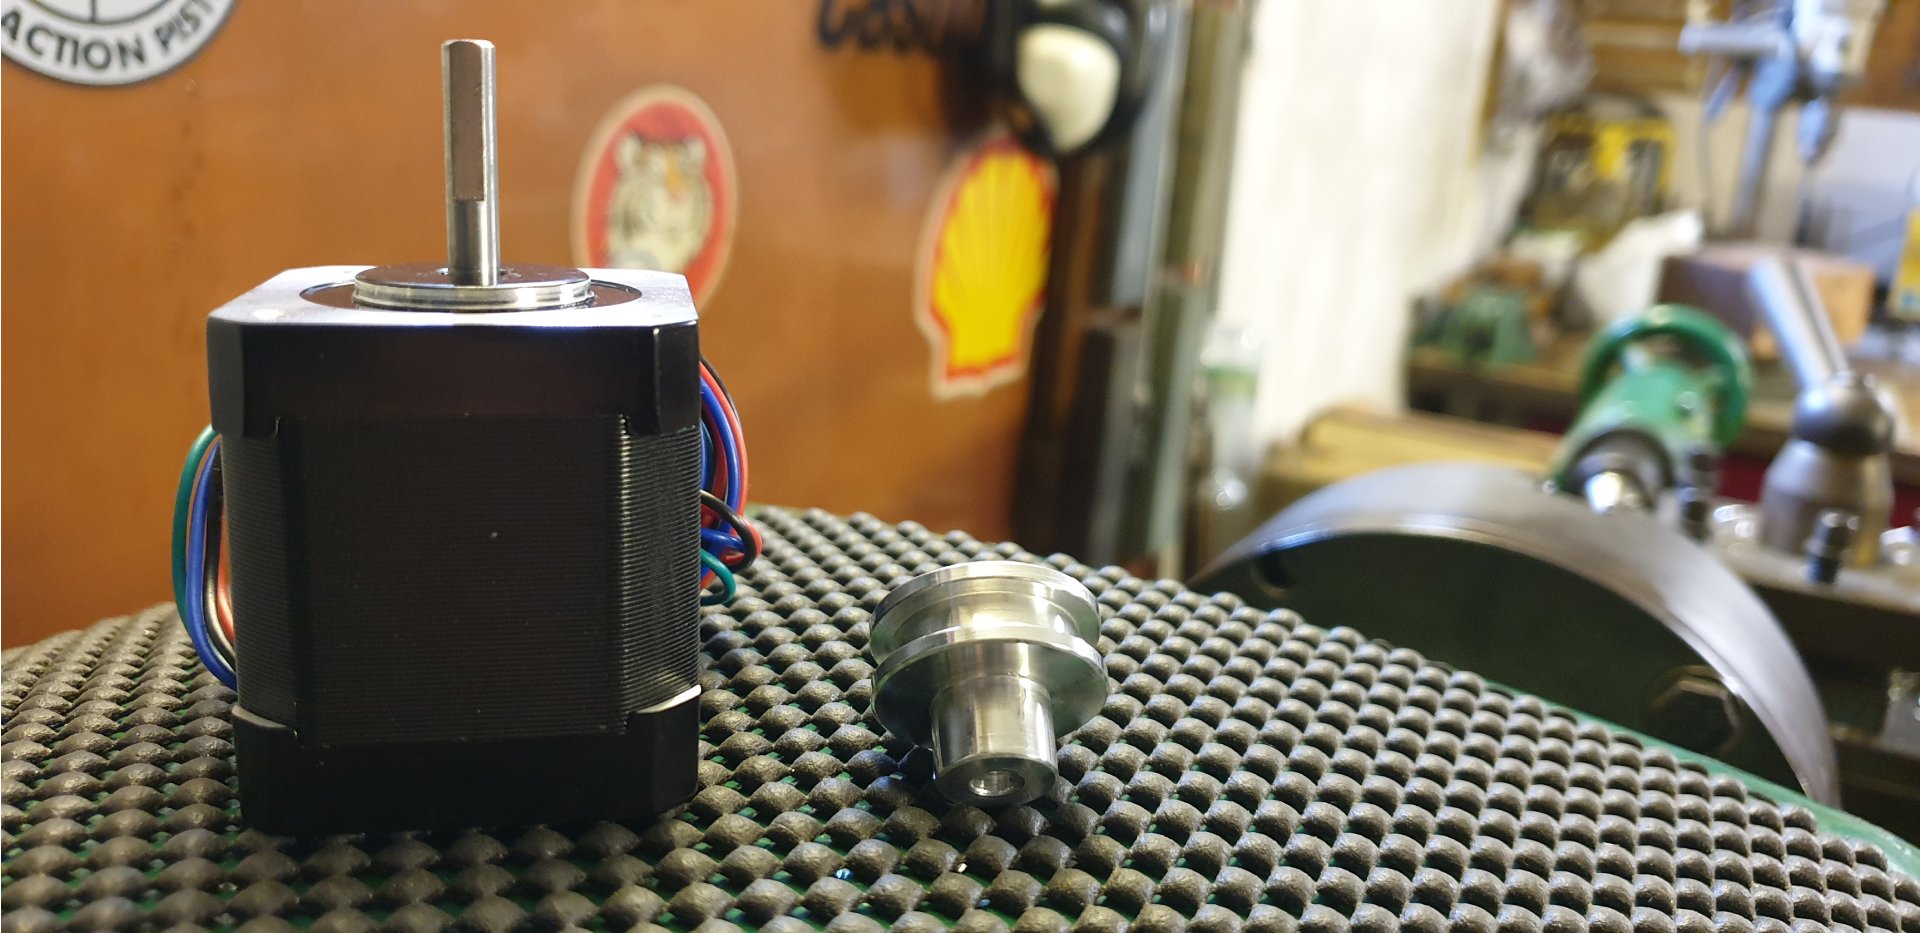
Last parts I manufactured were pulleys for the rope leading towards the stepper motor and main pulley for the stepper itself. I lathed them from the aluminum rod and equipped with the ball bearings (type 624ZZ, except the main pulley).

Pulley holders were 3D printed like most of other holders which Inova needs. As the material I chose PET-G (replaced by ASA later on) even I know is not perfectly heat resistant. I hope these parts will survive Inova’s development and testing until Inova will be ready to print them from PA12 (it is a PA12 3D printer).
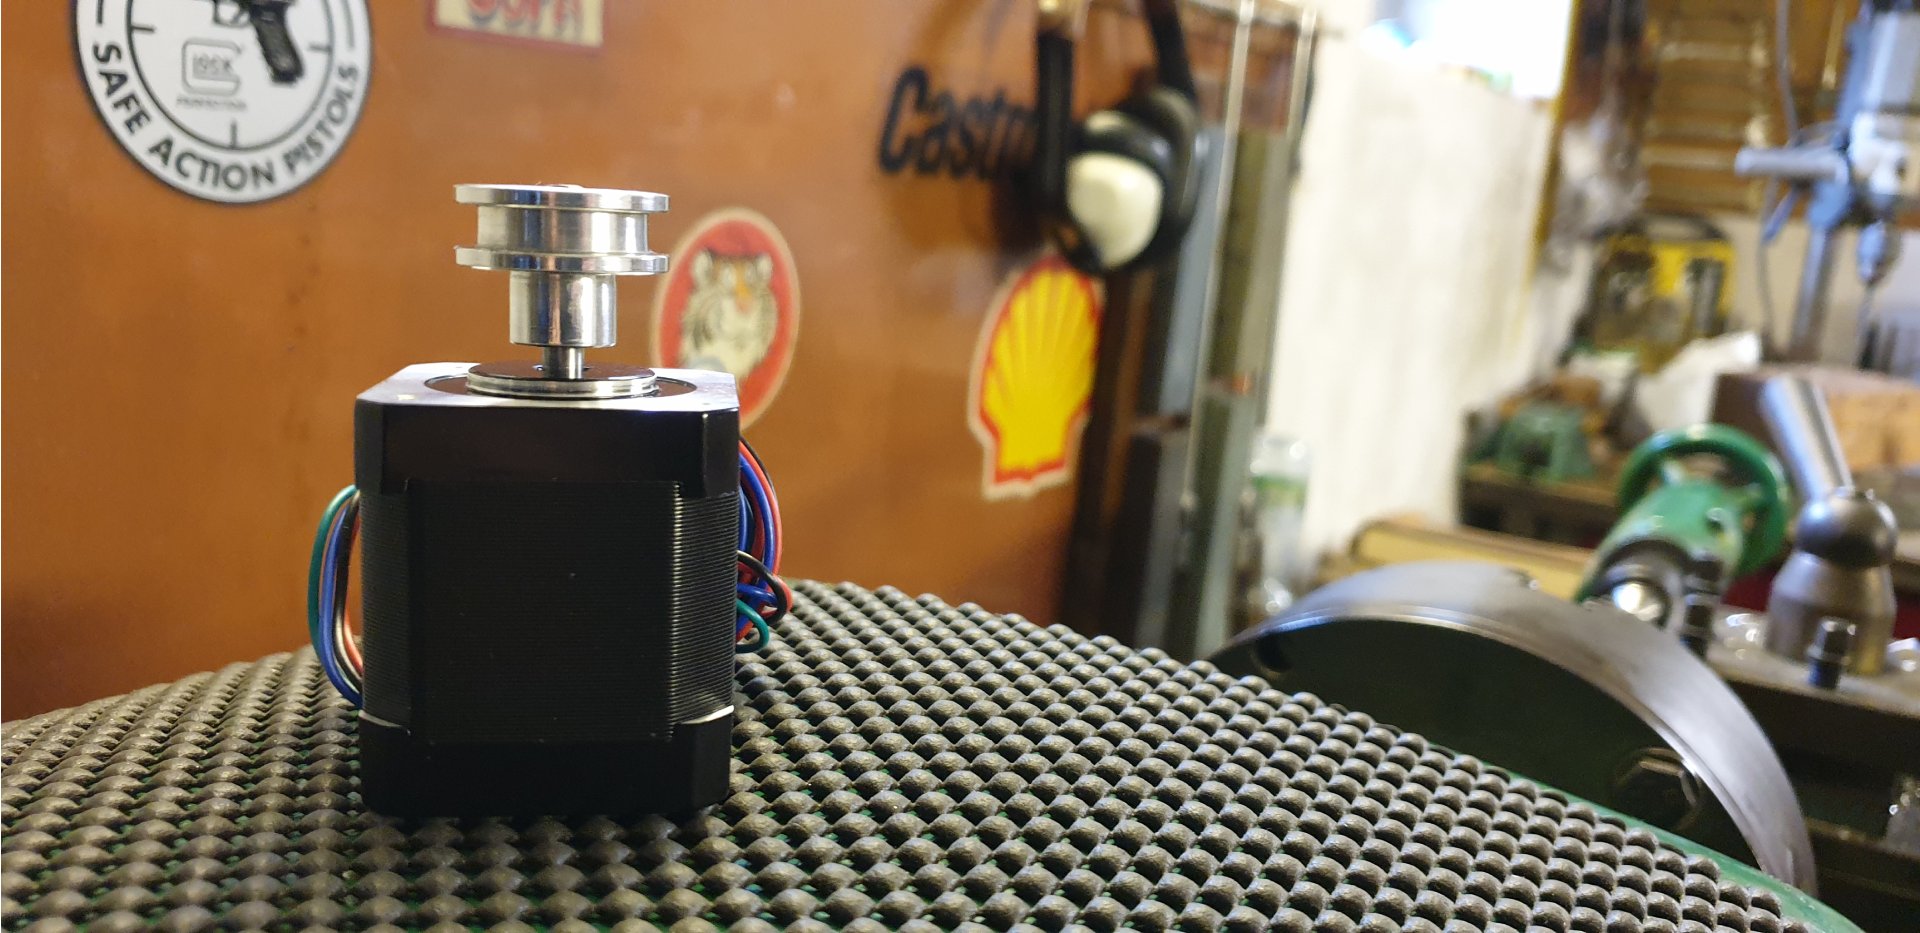
I used stepper motor NEMA17 as the recoater’s driving element. Due to potential of high temperatures, moving parts are not connected with the toothed belt but with the small diameter rope.
And here is the stepper motor pulley – nothing special, simply pulley.
Rope material selection and testing
Rope material selection and structure was the task for itself. I thought I need flexible rope to be capable to easily make small diameter loops around the pulley. Therefore, I started with the special fabric rope but it had not enough friction at drive pulley. Then I moved to steel rope (1mm in diameter) having the 7×19 and lately even 7×49 structure. It worked well in principle, but the problem was the rope tendency to over-skipping on the pulley which led to rope crossing and unwanted friction. After several tests I ended up with the steel 1×19, 0.5mm diameter rope. It was, to my surprise, still able to wrap the pulley well and as it was not too flexible had limited tendencies to over-skipping. Another issue was the selection of the right type of linear bearings.
Linear bearing’s problems
I started with the classical LM8UU. Problem, or better said trouble, was the noise coming from the whole assembly while moving along the smooth rods. As rods are relatively long, they tend to lead sound from the rolling balls into the other printer’s parts. It was not completely terrible, but I wanted to have Inova quieter. So, I decided to test the igus® plastic linear bearings. While I was sliding them in my hands along the rods, I was really pleased how silent these are. But as life is not easy, when I changed all the bearings, put them into their housings and completed the rest of the recoater assembly, it didn’t work at all. Igus® bearings are great but incline to lock themself when the force moving them along the rods is not ideally axial. And it was, on one side of the recoater assembly, unfortunately not the case.
To be honest I realized after some testing that the only way how to fix it is to make some changes in the recoater design what I didn’t want to undertake at that time. Therefore, I installed the LM8UU again (the recoater moves are a bit loud) and put this issue on my bullet list for v2 revision my PA12 3D printer where are changes regarding the recoater regular maintenance, etc.
Note:
Pictures above do not show the PTFE heat spacers I added later on – see Build gallery.
—
Join us on Discord